Getting Started with CyberConnect
A Complete Guide

CyberConnect is a decentralized social network protocol that helps decentralized applications (dApps) bootstrap network effects and build personalized social experiences.
What is CyberConnect?
CyberConnect is a decentralized social network protocol that helps developers build their Web3 social applications. It has a data infrastructure that helps store and manage users’ self-sovereign social data at scale and a smart contract protocol for creating on-chain social networks. The smart contract protocol is live on BNB chain. This guide will cover the smart contract protocol with examples on the BSC testnet.
How does it work?
Profile
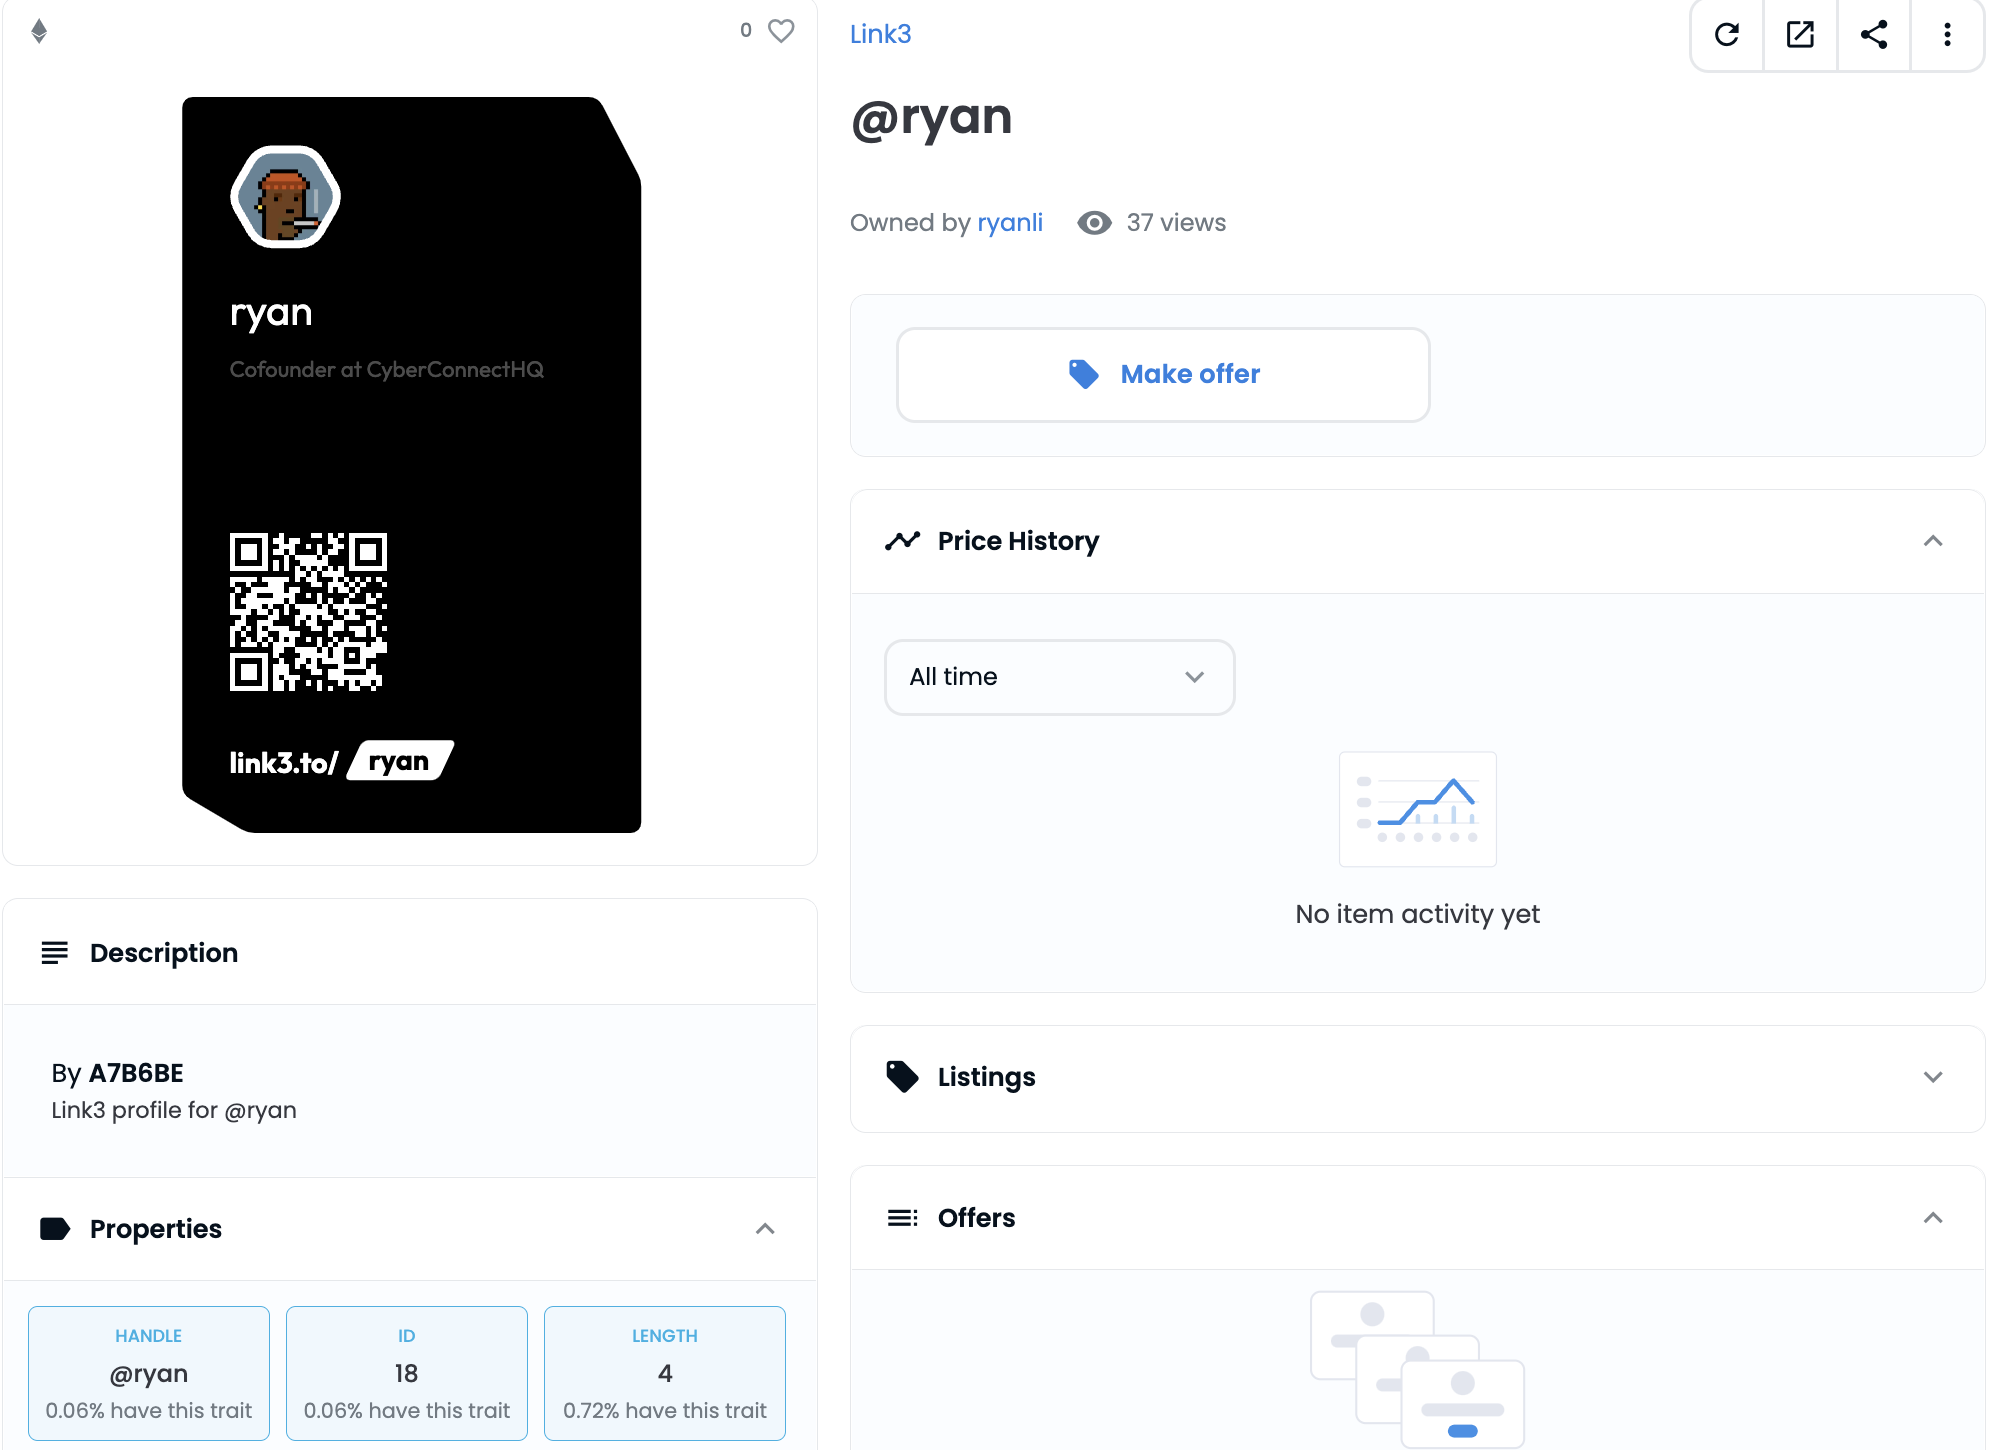
CyberConnect profile serves as the entry point for every on-chain action and therefore, it is just like a profile in Web2 social applications. Each profile is an ERC-721 NFT and owns its paid subscribers and content. Currently, the protocol allows people to mint profiles through cc.me on BNB Chain while minting profiles is free on testnet.
Content
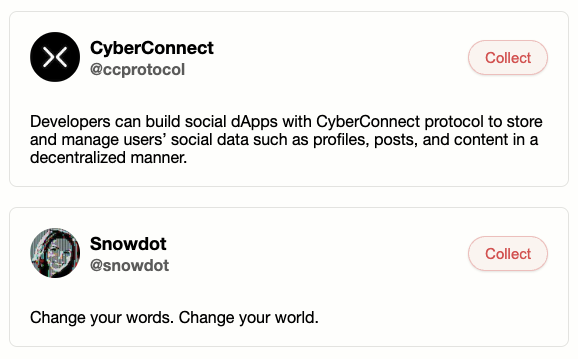
After creating their profiles, users can start building their on-chain social network by creating “content”. In CyberConnect, content could be anything that a user creates, issues, or builds. This design enables dynamic use cases like:
Creators posting short-form content on video platforms,
Event organizers issuing reward/recognition badges for participation, or
Universities issue verifiable credentials like diplomas for students.
All content is represented in the format of an ERC-721 token called EssenceNFT. The content itself can be stored on different storage platforms like IPFS or Arweave, depending on the developer’s discretion.
The protocol also offers Collect Middleware Contracts. With that, every profile owner can include custom functionality on ‘collecting’ conditions (e.g. pay to collect or hold NFT to collect) and token nature (e.g. transferable or non-transferable). A case in point would be Link3. The Web3 social network of verifiable identities utilizes EssenceNFT to enable organization profiles to issue attendance badges/SBTs. Our own demo app uses EssenceNFT to represent a post.
Subscribe
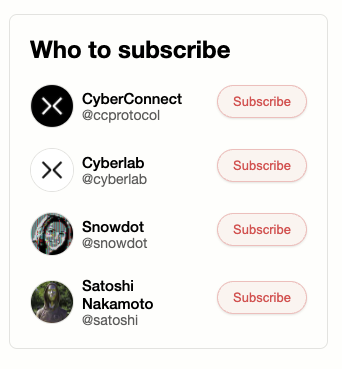
With CyberConnect’s Smart Contract Protocol, Web3 users have the ability to enable paid subscriptions to their profiles. Our Subscribe Middleware Contracts will prove to be essential when setting up rules for profile subscriptions. Each subscriber will be issued a SubscribeNFT upon a successful subscription.
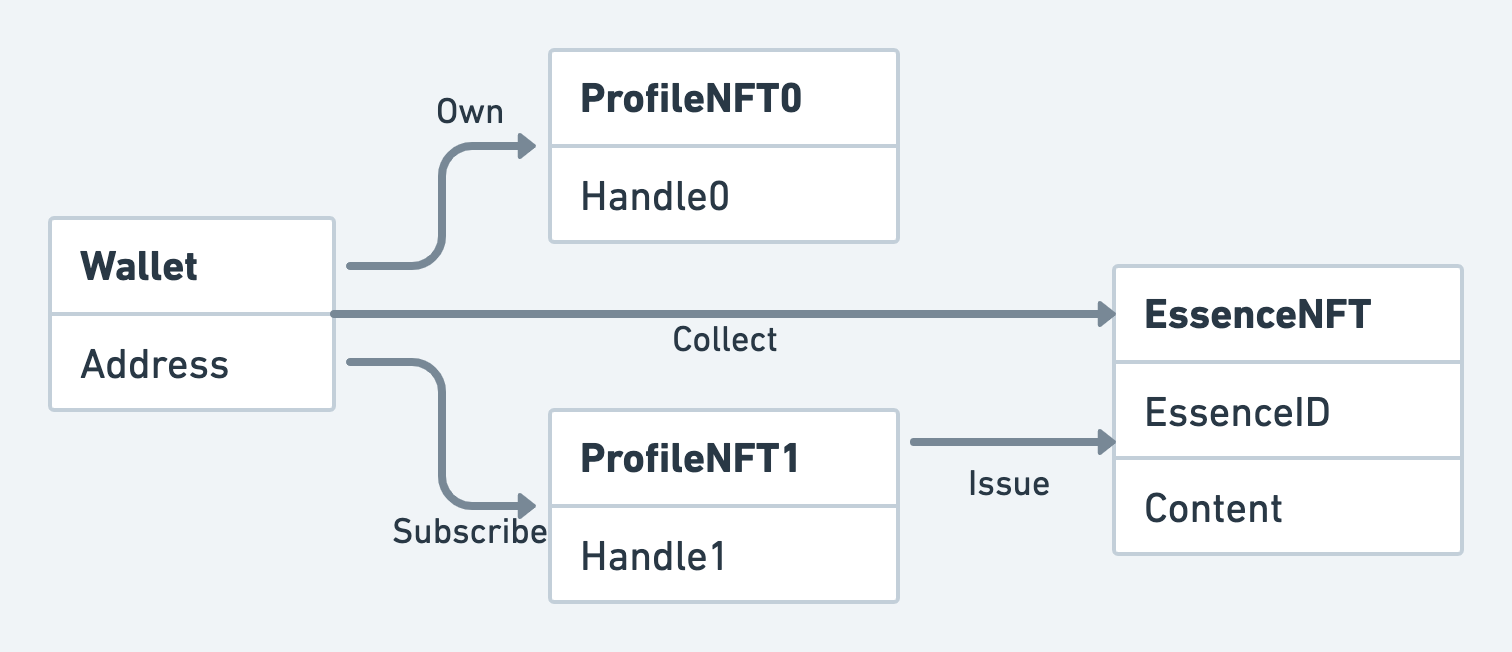
Interaction
A general interaction is illustrated in the diagram below:
Getting started with CyberConnect API
The CyberConnect API is a GraphQL API, which can be tested on Playground easily. All available queries are clearly visible on Playground. For example, one can get profile info by the handle or profile id directly. We encourage developers to explore more queries here!
query {
  profileByHandle(handle: "ryan") {
    profileID
    owner {
      address
    }
    avatar
    metadata
    metadataInfo {
      name
      bio
      title
      organization
    }
  }
}
// response data
{
  "data": {
    "profileByHandle": {
      "profileID": 18,
      "owner": {
        "address": "0x7C04786F04c522ca664Bb8b6804E0d182eec505F"
      },
      "avatar": "https://cyberconnect.mypinata.cloud/ipfs/bafkreib22x3t2br3w2dnmkm4lpcmngqngdbiaaubasgpyqme234wblhju4",
      "metadata": "Qmapk16yCpzXcCEh6GJroj99FASi4nZv52KtQzPLPCtcML",
      "metadataInfo": {
        "name": "ryan",
        "bio": "",
        "title": "Cofounder",
        "organization": "CyberConnectHQ"
      }
    }
  }
}
It’s worth mentioning that the CyberConnect team build its own indexer to:
Index on-chain data and serve API queries, and
Act as a relayer for gasless transactions (meta transactions).
However, since all data is publicly accessible on-chain, anyone can interact with the protocol directly without using the APIs and building their own indexers/relayers to query, aggregate, and serve these data.
Build a Simple Content App with CyberConnect
Now that you have a good understanding of CyberConnect Protocol, let’s build a simple app! This app will cover the most commonly seen features of social apps such as creating a user profile, creating a post, subscribing to another user, and collecting users’ posts. You can find more detailed steps in our Developer Center.
Prerequisites
For this tutorial, you will need:
Basic understanding of React.js, GraphQL, and Web3.
Have Node.js, NPM, and MetaMask Chrome extension installed on your machine.
Quick Setup
- Clone the GitHub repo
git clone git@github.com:cyberconnecthq/cc-content-app.git
Set up env variables
1.
NEXT_PUBLIC_API_KEYandNEXT_PUBLIC_API_SECRETare for uploading metadata using Pinata (register on Pinata).2. For the development environment, you need to set
NEXT_PUBLIC_GRAPHQL_ENDPOINTtohttps://api.cyberconnect.dev/testnet/.3. When you call the
relaymutation from the API, you need to putX-API-KEY: process.env.NEXT_PUBLIC_CYBERCONNECT_API_KEYin the request header, you can register the key from the dashboard.4. Last but not least, make sure to set
NEXT_PUBLIC_CHAIN_IDto97which is BSC Testnet.# .env NEXT_PUBLIC_API_KEY=*** // PINATA API KEY NEXT_PUBLIC_API_SECRET=*** // PINATA API SECRET NEXT_PUBLIC_CYBERCONNECT_API_KEY=*** // CyberConnect API KEY NEXT_PUBLIC_GRAPHQL_ENDPOINT=https://api.cyberconnect.dev/testnet/ NEXT_PUBLIC_CHAIN_ID=97 // BSC Testnet
Install & run locally
npm install
npm run dev
Authentication
- Login to get an access token for authentication purposes. This can be accomplished by sending out two GraphQL mutations:
LoginGetMessageandLoginVerify.
const messageResult = await loginGetMessage({
    variables: {
        input: {
            address: address,
            domain: DOMAIN
        },
    },
});
const message = messageResult?.data?.loginGetMessage?.message;

// Get the user's signature for the message
const signature = await signer.signMessage(message);

// Authenticate
const accessTokenResult = await loginVerify(...);
const accessToken = accessTokenResult?.data?.loginVerify?.accessToken;
- Set up the
ApolloClientso that whenever you make a request, it will pass theaccessTokenand CyberConnect API Key in the HTTP header.
...
    return {
        headers: {
            ...headers,
            Authorization: accessToken ? `bearer ${accessToken}` : "",
            "X-API-KEY": process.env.NEXT_PUBLIC_CYBERCONNECT_API_KEY,
        },
    };
...
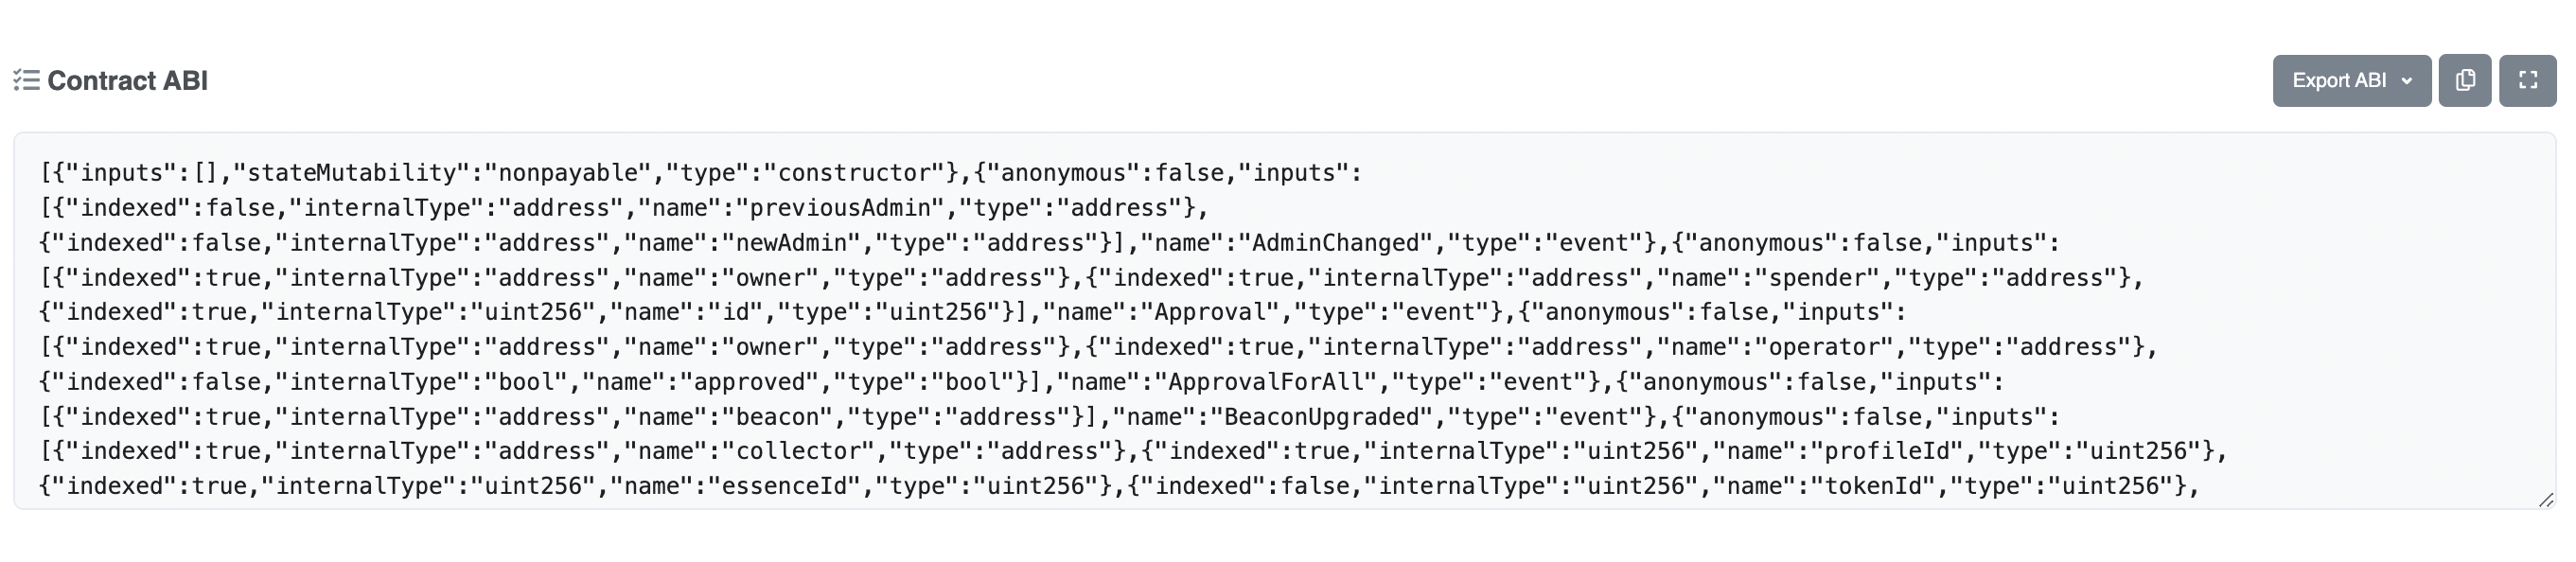
Smart Contract ABI
To talk to an external smart contact from our application, we need:
The contract addresses
The contract ABI (Application Binary Interface)
- You can find all deployed contract addresses in the cheat sheet. It’s important to note that
CC Profile (Proxy)is the one you will be interacting with for most of your actions such ascreateProfile,collect, andsubscribe(all example transactions in this tutorial will interact with this contract).
// BSC Testnet
const profileProxyAddress = "0x57e12b7a5f38a7f9c23ebd0400e6e53f2a45f271";
- You can find
CC Profile (Impl)contract's ABI on BscScan (BSC Testnet) and copy & paste the file for further usage.
Create Profile
- Set up the metadata so that your profile information can be indexed and displayed properly on marketplaces like OpenSea.
const metadata = {
    name: name,
    bio: bio,
    handle: handle,
    version: "1.0.0",
};
- Send our ‘create profile’ transaction. The
preDataandpostDataare used for middleware and we can safely ignore them for now.
const tx = await contract.createProfile(
    {
        to: address,
        handle: handle,
        avatar: avatar,
        metadata: metadataStr,
        operator: PROFILE_NFT_OPERATOR,
    },
    // preData
    0x0,
    // postData
    0x0
);
Subscribe to Profile
Subscribing to a profile is a three-step process and requires two GraphQL mutations: CreateSubscribeTypedData and Relay. If you’re unfamiliar with typed data, you can read more about it here.
- Get
typedDataandtypedDataID
/* Create typed data in a readable format */
const typedDataResult = await createSubscribeTypedData({
    variables: {
        input: {
            profileIDs: [profileID],
        },
    },
});
const typedData = typedDataResult.data?.createSubscribeTypedData?.typedData;
const message = typedData.data;
const typedDataID = typedData.id;
- Let the user sign the message data and get
signature.
/* Create typed data in a readable format */
const typedDataResult = await createSubscribeTypedData({
    variables: {
        input: {
            profileIDs: [profileID],
        },
    },
});
const typedData = typedDataResult.data?.createSubscribeTypedData?.typedData;
const message = typedData.data;
const typedDataID = typedData.id;
- Call the
relay, pass it thetypedDataIDandsignatureand get therelayActionId.
const relayResult = await relay({
  variables: {
    input: {
      typedDataID: typedDataID,
      signature: signature
    }
  }
});

const relayActionId = relayResult?.data?.relay.relayActionId;
- Call
relayActionStatusto receivetxHash.
const res = await getRelayActionStatus({
  variables: {
    relayActionId: relayActionId
  },
});
console.log("txHash", res?.data?.relayActionStatus?.txHash);
Create a Post
The process of creating a post involves a step to Register an Essence. These steps are mainly for you to customize the appearance and minting logic (middleware) of the EssenceNFT.
- Construct the metadata object for EssenceNFT
The Metadata schema is a standard template used to store data related to content and the NFT. Some of the fields are following the OpenSea Metadata Standards to ensure they can be displayed properly on OpenSea and other marketplaces. Other fields like app_id and tags are mainly used for query filter purposes.
const metadata: IEssenceMetadata = {
    metadata_id: uuidv4(),
    version: Version.V1,
    app_id: "cyberconnect",
    lang: "en",
    issue_date: new Date().toISOString(),
    content: post,
    media: [],
    tags: [],
    image: nftImageURL ? nftImageURL : "",
    image_data: !nftImageURL ? svg_data : "",
    name: `@${handle}'s post`,
    description: `@${handle}'s post on CyberConnect Content app`,
    animation_url: "",
    external_url: "",
    attributes: [],
};
- Upload the metadata to IPFS to get the hash
const ipfsHash = await pinJSONToIPFS(metadata);
- Create the typed data, let the user sign it, and relay the transaction
This step is exactly the same as subscribing to a profile except for the typed data field. We are using CreateRegisterEssenceTypedData when creating a post.
const typedDataResult = await createRegisterEssenceTypedData({
    variables: {
        input: {
            /* The profile id under which the Essence is registered */
            profileID: profileID,
            /* Name of the Essence */
            name: "Post",
            /* Symbol of the Essence */
            symbol: "POST",
            /* URL for the JSON object containing data about content and the Essence NFT */
            tokenURI: `https://cyberconnect.mypinata.cloud/ipfs/${ipfsHash}`,
            /* Middleware that allows users to collect the Essence NFT for free */
            middleware: {
                collectFree: true,
            },
            /* Set if the Essence should be transferable or not */
            transferable: true,
        },
    },
});
It’s worth mentioning that you can either set the middleware here when registering the EssenceNFT or later in a separate call (see Setup Customized Middleware section).
Collect a Post
Collecting a post has exactly the same procedures as subscribing to a profile except for the typed data field. We will be using CreateCollectTypedData when collecting a post.
const typedDataResult = await createCollectTypedData({
    variables: {
        input: {
            profileIDs: [profileID],
        },
    },
});
Setup Customized Middleware
The above example uses the default behavior (free to mint) when a user tries to subscribe to a profile or collect a post. But what if a user wants to set up rules like “only BAYC holder can subscribe” or “pay 1 BSC to collect my 500 limited edition post”? To enable dynamic rules, the CyberConnect protocol provides various CollectMiddleware and SubscribeMiddleware. We will go through a quick example of setting up a CollectPaidMw.
The user signing and relay process are exactly the same as in the steps in Subscribe to Profile. We are using CreateSetEssenceDataTypedData when setting middleware.
const typedDataResult = await createSetEssenceDataTypedData({
    variables: {
        input: {
            /* The id of the essence the middleware is set for */
            essenceId: essenceID,
            /* The id of the profile that created the essence */
            profileId: profileID,
            /* URL for the JSON object containing data about content and the Essence NFT */
            tokenURI: `https://cyberconnect.mypinata.cloud/ipfs/QmWeusbdbY2SEry1GEiJpmzd3Frp29wMNS3ZbNN21hLbVw`,
            /* The middleware that will be set for the essence */
            middleware: {
                collectPaid: {
                    /* Address that will receive the amount */
                    recipient: account,
                    /* Number of times the Essence can be collected */
                    totalSupply: 1000,
                    /* Amount that needs to be paid to collect essence */
                    amount: 1,
                    /* The currency for the  amount. Chainlink token contract on Goerli */
                    currency: "0x326C977E6efc84E512bB9C30f76E30c160eD06FB",
                    /* If it requires that the collector is also subscribed */
                    subscribeRequired: false,
                },
            },
        },
    },
});
Conclusion
Congratulations! You’ve successfully created a social app using CyberConnect. Hope it provides a good understanding of the CyberConnect Protocol, how it works, and how to use CyberConnect APIs to create your next Web3 social app.
We strongly recommend the following on your journey in building with CyberConnect:
- Learn more about the CyberConnect Recommendation Engine
For lots of interesting data like recommended Web2 social profiles based on trading history, or recommended tokens the address should purchased based on modeling trading behavior & holdings relative to other addresses (i.e. collaborative filtering model).
- Extend the middleware contracts
You can create more interesting middleware contracts for other developers to use. A governance process oversees the whitelist of new middleware.
- Join our Discord if you have any questions!


