CyberTube: A decentralized video-sharing platform built on CyberConnect using Livepeer

Pre-read
Web3 Social dApps Need Video
Web3 has brought forth a new era for social applications, with this one built on the principles of user sovereignty over and interoperability of data. However, to truly compete with modern-day Web2 social applications, these dApps (decentralized applications) must incorporate all forms of content that users have come to expect. Video has become an increasingly dominant medium for content, driving unprecedented levels of user engagement, communication, and sharing. As we transition to Web3, and in order to maintain user interest and facilitate adoption, it is crucial for dApps to offer video experiences that are similarly rich and immersive.
Over the past decade, we have witnessed the skyrocketing rise of video content, with platforms like YouTube, TikTok, and Instagram leading the charge. This growth is primarily driven by the visually captivating nature of video, its information density, the ease of passive consumption, and the increasing accessibility of high-speed internet connections and advanced devices. Video has also opened up new avenues to connect with people. Through live streaming, video-on-demand, and short-form content, people can now share their stories, talents, and expertise with a global audience, often leading to rapid growth in followers and engagement, and monetization opportunities. Video has become a driving force for user-generated content, advertising, and the development of online communities.
Web3 social is empowering individuals and communities to share, create, and engage in a more equitable and self-sovereign digital environment. As the Web3 social space matures and we onboard a wider mass user base, it is essential that dApps keep pace with the growing demand for video content. Integrating video capabilities into Web3 social dApps will enable users to continue enjoying the rich experiences they have come to expect while benefiting from the added benefits of decentralization.
By integrating Livepeer with CyberConnect's decentralized social graph, we can unlock the full potential of video in the Web3 social space. This collaboration will facilitate seamless video streaming, transcoding, and distribution, and ensures that users can enjoy high-quality, low-latency video content without sacrificing the core principles of decentralization. As we move forward, the synergy between these technologies will play a pivotal role in shaping the future of social interaction, communication, content creation, consumption, and monetization in the Web3 era.
What is CyberConnect?
CyberConnect is a decentralized social graph protocol with identity sovereignty for mass adoption and network effects. To enable dApps in building Web3-native social experiences, CyberConnect Social Graph offers developers a robust set of tools to build composable applications utilizing all user-created content and social connections generated on the CyberConnect protocol. To enable programmability and scalability, CyberConnect Social Graph implements a hybrid architecture with Smart Contracts and Scalable Storage Modules.
CyberConnect Social Graph’s smart contracts represent key elements of social data in the format of ERC-721 tokens with the flexibility of customizing them as non-transferable SBTs (soulbound tokens). Three core concepts make up the CyberConnect protocol, namely ProfileNFT, SubscriberNFT, and EssenceNFT. When user A follows user B from their on-chain profile, user A mints user B’s SubscriberNFT. Further, when user A creates a post, they may choose to use EssenceNFT to represent the post and implement on-chain monetization.
The protocol also offers a rich set of customizable and extensible middleware smart contracts for ProfileNFT owners to choose when they want to issue their SubscriberNFT or EssenceNFT. The middleware design enables users to implement Web3-native use cases like “only BAYC holders can subscribe” or “pay 1 ETH to collect my 500 limited edition posts.” To learn more, visit CyberConnect Developer Center or dive deep into our previous tutorials.
What is Livepeer?
Livepeer is a protocol for developers who want to add live or on-demand video to their projects. It aims to increase the reliability of video streaming while reducing costs associated with it by up to 50x.
To achieve this Livepeer is building a p2p infrastructure that interacts through a marketplace secured by the Ethereum blockchain.
Integrating Livepeer with CyberConnect
For this tutorial, we’re going to be drawing a lot of the visual/frontend inspiration from Suhail Kakar's (DevRel Engineer @ Livepeer) repo ytweb3. The tutorial will demonstrate the core video-sharing capabilities of Livepeer and showcase how Livepeer videos can be published/minted as EssenceNFTs within the CyberConnect protocol; allowing users to collect videos as NFTs and allowing creators to monetize their content through the use of CyberConnect's customizable and extensible middleware smart contracts.
💡 You can find the full code for this tutorial here cc-livepeer
Prerequisites
For this tutorial, you will need the following:
Basic understanding of React.js, GraphQL, and Web3
Have Node.js, NPM, and MetaMask Chrome extensions installed on your machine
Getting Started
We’re going to first start by cloning the completed app here cc-livepeer
git clone https://github.com/cyberconnecthq/cc-livepeer && cd cc-livepeer
Next, we’ll install dependencies
npm install # or yarn install
Next, we’ll need to set up a .env file with your credentials. Create a .env file and get an API key from Livepeer studio , CyberConnect, Pinata & NodeReal and a project id from WalletConnect.
NEXT_PUBLIC_LIVEPEER_KEY="YOUR_KEY"
NEXT_PUBLIC_CYBERCONNECT_API_KEY="YOUR_KEY"
NEXT_PUBLIC_NODEREAL_API_KEY="YOUR_KEY"
NEXT_PUBLIC_PINATA_API_KEY="YOUR_KEY"
NEXT_PUBLIC_PINATA_API_SECRET="YOUR_KEY"
NEXT_PUBLIC_WALLETCONNECT_PROJECT_ID="YOUR_KEY"
You can replace NodeReal with any other RPC provider if you prefer, as long as they support BNB & BNB Tesnet.
You should now be able to run the original demo app
npm run dev # or yarn run dev
and see a UI similar to the one at https://cc-livepeer.vercel.app/.
Authentication
The first step to enable CyberConnect's API into our video-sharing app will be to set up a few helpful context wrappers around our application that cover:
AuthContextProvider(custom context for storing connected user's profile, access tokens and relaying transactions statuses)WagmiConfig(component manages configuration for all hooks usingwagmi)ThemeProvider(controls switching between light/dark mode)RainbowAuthProvider(custom authentication described further below)LivepeerConfig(TheLivepeerConfigcomponent manages configuration for all hooks using React Context)
function MyApp({ Component, pageProps }) {
  return (
    //  ApolloProvider is a wrapper around the Apollo Client
    <ApolloProvider client={apolloClient}>
      {/* AuthContextProvider is a wrapper around the Wagmi AuthContext */}
      <AuthContextProvider>
        {/* WagmiConfig is a wrapper around the Wagmi client */}
        <WagmiConfig client={wagmiClient}>
          {/* ThemeProvider is a wrapper around the theme context */}
          <ThemeProvider>
            {/* RainbowAuthProvider is a wrapper around the RainbowKitAuthenticationProvider */}
            <RainbowAuthProvider>
              {/* LivepeerConfig is a wrapper around the Livepeer client */}
              <LivepeerConfig client={LivePeerClient}>
                <NextUIProvider>
                  <Component {...pageProps} />
                </NextUIProvider>
                {/* Toaster is a wrapper around the react-hot-toast library */}
                <Toaster />
              </LivepeerConfig>
            </RainbowAuthProvider>
          </ThemeProvider>
        </WagmiConfig>
      </AuthContextProvider>
    </ApolloProvider>
  );
}

export default MyApp;
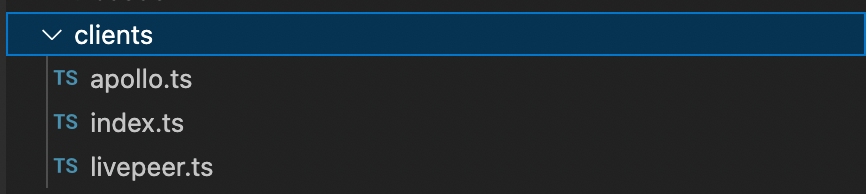
Setting up the Apollo, Livepeer, Wagmi & Theme wrappers is fairly straightforward so we'll skip that here, but you can find the client instantiation code for Apollo/Livepeer in the client's directory at the root of the repo:
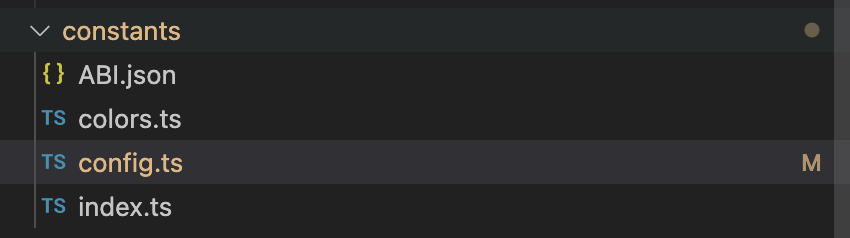
Furthermore, you can find the configuration of WagmiClient within config.ts file in the constants directory
Setting up useful app Context in custom AuthContext
The AuthContextProvider we referenced above will be used to store the connected user's profile, access tokens, and relay transaction statuses.
Through CyberConnect's API, most mutations that require/lead to on-chain transactions are triggered through the async relay API that will queue the transaction for broadcasting and minting the NFT for the given essence.
In order to track the status of these relayed transactions and maintain the state between different components, we'll handle the polling (through the relayActionStatus API) within this context wrapper. This way if the user leaves the page we'll still continue to poll for tx status until it returns. Since the AuthContext component is fairly large, we'll omit the entire code here but the important useEffect to take note of are
- Checking the relaying/indexing status of queued transactions
useEffect(() => {
    let _indexingPosts = indexingPosts;

    async function sync(indexingPostsParam) {
      indexingPostsParam.forEach(async (post: any) => {
        const res = await getRelayActionStatus({
          variables: { relayActionId: post.relayActionId },
          fetchPolicy: "network-only",
        });

        console.log("res 3000", res.data.relayActionStatus);

        if (res.data.relayActionStatus.txStatus === "SUCCESS") {
          toast.success("Post successfully relayed");
          console.log("indexingPostsParam", indexingPostsParam);
          _indexingPosts = [];
          const filtered = indexingPostsParam.filter(
            (item: any) => item.relayActionId !== post.relayActionId
          );
          console.log("filtered", filtered);
          setIndexingPosts([]);
          router.push(`/profile`);
        } else if (res.data.relayActionStatus?.reason) {
          toast.error(res.data.relayActionStatus?.reason);
          const filtered = indexingPostsParam.filter(
            (item: any) => item.relayActionId !== post.relayActionId
          );
          console.log("filtered", filtered);
          setIndexingPosts([]);
        }

        if (_indexingPosts?.length > 0) {
          await new Promise((resolve) => setTimeout(resolve, 5000));
          console.log("length of indexing posts", _indexingPosts.length);
          console.log("indexing posts", _indexingPosts);
          await sync(_indexingPosts);
        }
      });
    }

    if (address && indexingPosts?.length > 0) {
      sync(_indexingPosts);
    }
  }, [indexingPosts, address]);
- Getting the primary profile (if it exists) of the connected user (you can find the graphql query here (https://github.com/cyberconnecthq/cc-livepeer/blob/aa4496915ab7a9aca25cf8da18d07329c7fb39d1/graphql/PrimaryProfile.ts#L1-L20)
useEffect(() => {
    if (!(address && accessToken)) return;
    let query: any;
    const fetch = async () => {
      try {
        /* Fetch primary profile */
        query = useCancellableQuery({
          query: PRIMARY_PROFILE,
          variables: {
            address: address,
          },
        });
        const res = await query;
        /* Get the primary profile */
        const primaryProfile = res?.data?.address?.wallet?.primaryProfile;
        /* Set the primary profile */
        setPrimaryProfile(primaryProfile);
      } catch (error) {
        /* Display error message */
        console.error(error);
      }
    };
    fetch();
    return () => {
      query.cancel();
    };
  }, [address, accessToken]);
- Updating the login state of the user based on authentication from rainbow provider is described below
/* State variable to store the logged in state */
  const [isLoggedIn, setIsLoggedIn] = useState<boolean | undefined>(undefined);

  useEffect(() => {
    setIsLoggedIn(
      address &&
        status === "connected" &&
        !!window.localStorage[ACCESS_TOKEN_KEY] &&
        window.localStorage[WALLET_KEY] == address
    );
  }, [address, status]);
Setting up custom RainbowAuthProvider
Authenticating user requests through CyberConnect's API requires a bearer token generated from a signed message from the user's wallet. This is described in depth in our [previous blog here] (https://cyberconnect.hashnode.dev/getting-started-with-cyberconnect#heading-authentication) as well as [in our docs here](https://docs.cyberconnect.me/api/authentication/user-login)
The important thing to know is we'll need these two graphql queries to complete the custom authentication flow:
##  This is the mutation that will be used to get the nonce from the CyberConnect generated message
mutation getNonce($domain: String!, $address: AddressEVM!) {
    loginGetMessage(input: { domain: $domain, address: $address }) {
      message
    }
  }
## This is the mutation that will be used to verify the signature and get the access token
mutation loginVerify($domain: String!, $address: AddressEVM!, $signature: String!, $isEIP1271: Boolean) {
    loginVerify(input: { domain: $domain, address: $address, signature: $signature, isEIP1271: $isEIP1271 }) {
      accessToken
      refreshToken
    }
  }
Following the instructions from https://www.rainbowkit.com/docs/custom-authentication, we'll create a custom authentication adapter that will allow RainbowKit to create/prepare messages and communicate with the CyberConnect API back-end.
export function RainbowAuthProvider({
  children,
}: {
  children: React.ReactNode;
}) {
  // GraphQL mutations
  const [getNonce] = useMutation(GET_NONCE);
  const [verify] = useMutation(VERIFY);
  // Hooks
  const { address } = useAccount();
  const { isLoggedIn, setIsLoggedIn, setAccessToken } = useContext(AuthContext);
  const { theme, setTheme } = useContext(ThemeContext);
  const provider = useProvider();

  // Authentication status
  const [authStatus, setAuthStatus] =
    useState<AuthenticationStatus>("unauthenticated");

  // Set authentication status when isLoggedIn changes
  useEffect(() => {
    setAuthStatus(isLoggedIn ? "authenticated" : "unauthenticated");
  }, [isLoggedIn]);

  // Authentication adapter
  const authenticationAdapter = createAuthenticationAdapter({
    // Get nonce from GraphQL endpoint
    getNonce: async () => {
      console.log("domain", DOMAIN);
      const res = await getNonce({
        variables: {
          address,
          domain: DOMAIN,
        },
      });
      return new Promise((resolve) => {
        resolve(res.data?.loginGetMessage.message!);
      });
    },
    // Create message with nonce
    createMessage: ({ nonce }) => {
      return nonce;
    },

    // Get message body from response
    getMessageBody: ({ message }: any) => {
      return message;
    },

    // Verify signature with GraphQL endpoint
    verify: async ({ signature }) => {
      const code = await provider.getCode(address!);
      const isEIP1271 = code !== "0x";
      const res = await verify({
        variables: {
          domain: DOMAIN,
          address,
          signature,
          isEIP1271,
        },
      });
      const accessToken = res.data?.loginVerify.accessToken;
      const refreshToken = res.data?.loginVerify.refreshToken;
      if (!!accessToken && !!refreshToken) {
        // Store tokens and set authentication status
        window.localStorage.setItem(ACCESS_TOKEN_KEY, accessToken);
        window.localStorage.setItem(REFRESH_TOKEN_KEY, refreshToken);
        window.localStorage.setItem(WALLET_KEY, address!);
        setAccessToken(accessToken);
        setAuthStatus("authenticated");
        setIsLoggedIn(true);
        return new Promise((resolve) => {
          resolve(true);
        });
      } else {
        // Clear tokens and set authentication status to unauthenticated
        setAuthStatus("unauthenticated");
        window.localStorage.removeItem(ACCESS_TOKEN_KEY);
        window.localStorage.removeItem(WALLET_KEY);
        window.localStorage.removeItem(REFRESH_TOKEN_KEY);
        return new Promise((resolve) => {
          resolve(false);
        });
      }
    },

    // Sign out and clear tokens
    signOut: async () => {
      setAuthStatus("unauthenticated");
      window.localStorage.removeItem(ACCESS_TOKEN_KEY);
      window.localStorage.removeItem(WALLET_KEY);
      window.localStorage.removeItem(REFRESH_TOKEN_KEY);
      await apolloClient.resetStore();
    },
  });
  return (
    <RainbowKitAuthenticationProvider
      adapter={authenticationAdapter}
      status={authStatus}
    >
      <RainbowKitProvider
        chains={chains}
        theme={theme === "dark" ? midnightTheme() : undefined}
      >
        {children}
      </RainbowKitProvider>
    </RainbowKitAuthenticationProvider>
  );
}
The access tokens stored in localStorage will now come from the CyberConnect API rather than through RainbowKit's default auth flow. This token will be used as a bearer token within all subsequent requests to the API.
Uploading video to Livepeer & Registering an EssenceNFT
Now that users can connect their wallets & authenticate their accessToken through CyberConnect's API, it's time to build the core functionality of the app: uploading videos to Livepeer & registering them as EssenceNFTs.
The upload functionality will be within its own page/route, so we create an index.ts file within pages/upload and define the Upload() function.
The final result of the /upload page will look like this:
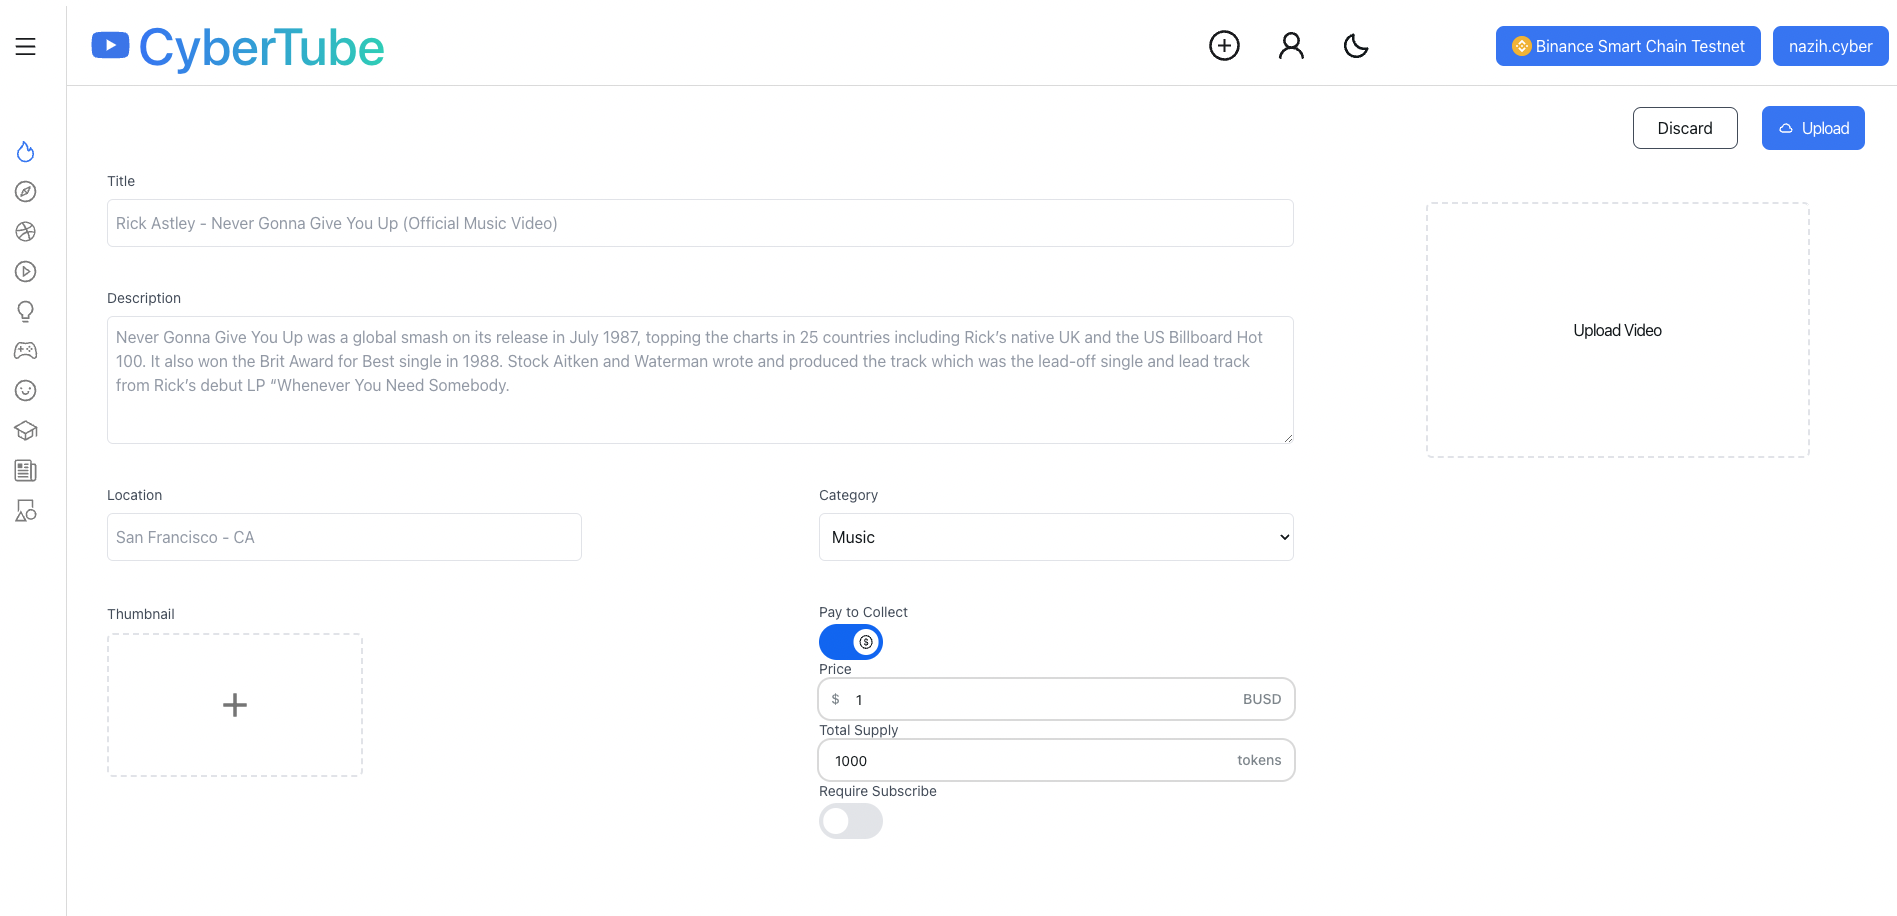
As you can see from the image, the important components we'll need are going to be:
Primary Field Input form for getting title/description/thumbnail/location and of course the video
Optional Fields Input Form for collecting the relevant fields if the user chooses to create a
COLLECT_PAIDessenceNFT (i.e. use theCollectPaidMwmiddleware contract to set conditions on who can collect & how much of an ERC20 - in this case BUSD - they must pay)Discard / Upload buttons to handle canceling the upload and uploading the data to Livepeer+CyberConnect contracts respectively
Primary Input Form for upload
We just need to create separate state variables to track changes to each input element in the form and create a standard HTML form with relevant inputs (the HTML is not included here for brevity)
const [title, setTitle] = useState<string>("");
const [description, setDescription] = useState<string>("");
const [category, setCategory] = useState<string>("");
const [location, setLocation] = useState<string>("");
const [thumbnail, setThumbnail] = useState<File>();
const [video, setVideo] = useState<File>();
Optional Paid Collect secondary form
the optional fields will only be shown if the user clicks the Switch component (from @next-ui/react). If opened, then the totalSupply/amount/price/subscribeRequired fields can be customized in the form shown.
To do this we'll first create two state variables to track whether the Switch component is opened and some default IMiddleWareProps
const defaultMiddleware: IMiddlewareProps = {
    recipient: address,
    totalSupply: "1000",
    amount: "1000000000000000000",
    currency: BUSD_CONTRACT_ADDRESS,
    subscribeRequired: false,
  };

const [showMiddleware, setShowMiddleware] = useState<boolean>(false);
const [middleware, setMiddleware] = useState<IMiddlewareProps>(defaultMiddleware);
Given that we can't create a COLLECT_PAID with 0 or negative price/amount, we'll add some validation to the input using this helper function (constants defined here)
 const handleAmountChange = (event) => {
    let value = Number(event.target.value);
    if (isNaN(value)) {
      value = 0.01;
    } else if (value > MAX_MINT_PRICE) {
      value = MAX_MINT_PRICE;
    } else if (value < MIN_MINT_PRICE) {
      value = MIN_MINT_PRICE;
    }
    setMiddleware({ ...middleware, amount: String(value * 10 ** 18) });
  };
We now have all the parts needed to create the secondary/optional form
<div className="flex w-2/5 flex-col    ">
                  <label className="text-sm text-gray-600  dark:text-[#9CA3AF]">
                    Pay to Collect
                  </label>
                  <Switch
                    size="xl"
                    icon={<AiOutlineDollarCircle />}
                    onChange={(e) => {
                      setShowMiddleware(e.target.checked);
                    }}
                  />
                  {showMiddleware && (
                    <div className="flex flex-col">
                      <label className="text-sm text-gray-600  dark:text-[#9CA3AF]">
                        Price
                      </label>
                      <Input
                        bordered
                        labelLeft="$"
                        labelRight="BUSD"
                        placeholder="1.00"
                        value={Number(middleware.amount) / 10 ** 18}
                        onChange={handleAmountChange}
                      />
                      <label className="text-sm text-gray-600  dark:text-[#9CA3AF]">
                        Total Supply
                      </label>
                      <Input
                        bordered
                        labelRight="tokens"
                        placeholder={"1000000000000000000"}
                        type="number"
                        value={middleware.totalSupply}
                        onChange={(e) =>
                          setMiddleware({
                            ...middleware,
                            totalSupply: String(e.target.value),
                          })
                        }
                      />
                      <label className="text-sm text-gray-600  dark:text-[#9CA3AF]">
                        Require Subscribe
                      </label>
                      <Switch
                        size="xl"
                        initialChecked={middleware.subscribeRequired}
                        onChange={(e) => {
                          setMiddleware({
                            ...middleware,
                            subscribeRequired: e.target.checked,
                          });
                        }}
                      />
                    </div>
                  )}
Upload Button Handler
To handle uploading the video & minting/relaying the EssenceNFT we first need to instantiate the useCreateAsset hook from Livepeer.js sdk
// Hook to Upload video to Livepeer
  const {
    mutate: createAsset,
    data: assets,
    status,
    progress,
    error,
  } = useCreateAsset(
    video
      ? {
          sources: [{ name: title, file: video }],
        }
      : null
  );
Then upon submission we can call the returned mutate function (aliased as createAsset and upload the thumbnail to IPFS (which will be registered within the EssenceNFT metadata
// Function to upload the thumbnail to IPFS
  const uploadThumbnail = async () => {
    // Passing the file to the pinFileToIPFS function and getting the CID
    const cid = await pinFileToIPFS(thumbnail);
    // Returning the CID
    return cid;
  };

  // When a user clicks on the upload button
  const handleSubmit = async () => {
    // Calling the create asset function from Livepeer SDK
    const createAssetResponse = await createAsset?.();
    console.log("createAssetResponse:", createAssetResponse);
    // Calling the upload thumbnail function and getting the CID
    const thumbnailCID = await uploadThumbnail();
    if (thumbnailCID) {
      setThumbnailCID(thumbnailCID);
    }
  };
This will begin the upload/processing of the video to Livepeer, and once the upload is successful the assets object also returned by the hook should get populated. We'll then create a useEffect hook to register the essence with the relevant data
useEffect(() => {
    const asyncSaveVideo = async () => {
      // check if the assets are available
      if (assets) {
        let data: IRegisterEssenceVideo = {
          livepeerId: assets[0]?.id,
          video: assets[0]?.playbackUrl,
          title,
          description,
          location,
          category,
          thumbnail: thumbnailCID?.ipfshash || "",
          UploadedDate: Date.now().toString(),
        };
        console.log("register essence data:", data);
        await registerEssence(data);
      }
    };
    asyncSaveVideo();
  }, [assets]);
The registerEssence function here is quite long, but the important component to go over is the metadata object construction
 /* Function to render the svg data for the NFT */
/* (default if the user doesn't pass a image url) */
const svg_data = getEssenceSVGData();

/* Construct the attributes for the Essence NFT */
const category_attribute: Attribute = {
  trait_type: "category",
  value: category,
  display_type: "string",
};
const livepeer_id_attribute: Attribute = {
  trait_type: "livepeer_id",
  value: livepeerId,
  display_type: "string",
};
/* Construct the media object for the Essence NFT */
const media: Media = {
  media_type: "video/mp4",
  media_url: video,
  alt_tag: title,
  preview_image_url: thumbnail,
};
/* Construct the metadata object for the Essence NFT */
const metadata: IEssenceMetadata = {
  metadata_id: uuidv4(),
  version: "1.0.0",
  app_id: ESSENCE_APP_ID,
  lang: "en",
  issue_date: new Date().toISOString(),
  content: description || randPhrase(),
  media: [media],
  tags: ["video", "livepeer"],
  image: thumbnail ? getImage(thumbnail) : "",
  image_data: !thumbnail ? svg_data : "",
  name: `@${primaryProfile?.handle}'s post`,
  description: `@${primaryProfile?.handle}'s post on CyberConnect Content app`,
  animation_url: "",
  external_url: "",
  attributes: [category_attribute, livepeer_id_attribute],
};
You can find the entire Essence Metadata schema (as well as the child Media/Attribute schemas) here https://github.com/cyberconnecthq/cc-livepeer/blob/aa4496915ab7a9aca25cf8da18d07329c7fb39d1/types/index.ts#L65-L137
A lot of these choices are up to the application, but here we've chosen to store the video category & hash within the attributes array. Also, we've stored the playback URL within the media field to add redundancy (aka a second pointer) to the Livepeer file location.
Once the metadata schema is defined we can execute the 3 steps detailed in our register essence docs here https://docs.cyberconnect.me/api/content/essence/register-essence, namely:
Create the type data (
createRegisterEssenceTypedData)Get user signature
Relay the transaction
 /* Create typed data in a readable format */
      const typedDataResult = await createRegisterEssenceTypedData({
        variables: {
          input: {
            /* The profile id under which the Essence is registered */
            profileID: primaryProfile?.profileID,
            /* Name of the Essence */
            name: title,
            /* Symbol of the Essence */
            symbol: "VIDEO",
            /* URL for the json object containing data about content and the Essence NFT */
            tokenURI: `https://cyberconnect.mypinata.cloud/ipfs/${ipfsHash}`,
            /* Middleware that allows users to collect the Essence NFT for free */
            middleware: !showMiddleware
              ? { collectFree: true }
              : { collectPaid: middleware },
            /* Set if the Essence should be transferable or not */
            transferable: true,
          },
        },
      });

      const typedData =
        typedDataResult.data?.createRegisterEssenceTypedData?.typedData;
      const message = typedData.data;
      const typedDataID = typedData.id;

      /* Get the signature for the message signed with the wallet */
      const fromAddress = await signer.getAddress();
      const params = [fromAddress, message];
      const method = "eth_signTypedData_v4";
      const signature = await signer.provider.send(method, params);

      /* Call the relay to broadcast the transaction */
      const relayResult = await relay({
        variables: {
          input: {
            typedDataID: typedDataID,
            signature: signature,
          },
        },
      });

      const relayActionId = relayResult.data.relay.relayActionId;
Awesome -- we've now completed the upload feature and here's a short demo of what it should look like:
Video Page & Collect EssenceNFT Button
Now that we have the Authentication & Uploading of videos covered, the only thing that's left is a way for users to view/play the videos and collect their associated EssenceNFTs.
Let's first cover the video page (where videos are played).
Player Component
For the video player component, we'll be using a slightly modified version of the page described in Suhail's demo here. Essentially we're just using Plyr component from plyr-react library and resolving the Livepeer hash to an asset and getting the downloadUrl
import Plyr from "plyr-react";
nterface PlayerProps {
  id: any;
}

const Player: React.FC<PlayerProps> = ({ id }) => {
  const { data: asset } = useAsset(id);
    return (
      <Plyr
        source={{
          type: "video",
          title: asset?.name,
          sources: [
            {
              src: asset?.downloadUrl,
              type: "video/mp4",
            },
          ],
        }}
        options={{
          autoplay: true,
        }}
        autoPlay={true}
      />
    );
...
Video Page/Route
Now we just need to set up a page/route to retrieve the Livepeer hash and populate it into this embedded player component. We'll create a [id].ts file within pages/video and define out Video() function. Since we want additional metadata from the EssenceNFT alongside the Livepeer video, we'll use the metadata_id of the EssenceNFT as the identifier/query of this route. We use import { useRouter } from 'next/router' to get the query/identifier of the page and resolve that to an essence using the ESSENCE_BY_ID graphql query (defined here) to get essence data from CyberConnect API.
export default function Video() {
  const router = useRouter()
  const { id } = router.query
  const [video, setVideo] = useState<IVideo | null>(null)
  const [essence, setEssence] = useState<IPostCard>(null)
  const [relatedVideos, setRelatedVideos] = useState<IVideo[]>([])
  const {address} =  useContext(AuthContext)
  const fetchVideos = () => {
    apolloClient.query({
      query: ESSENCE_BY_ID,
      variables: {
        metadataId: id,
        me: address
      },
      fetchPolicy: 'network-only',
    })
      .then(({ data }) => {
        const currentEssence = data?.essenceByFilter[0] || {}
        setEssence(currentEssence)
        const parsedVideos = data.essenceByFilter.map((essence: any) => essenceResponseToVideo(essence));
        const video = parsedVideos.find((video) => video.id === id)
        setVideo(video)
      })
      .catch((err) => {
        console.log('err', err)
      })
  }
  const fetchRelatedVideos = () => {
    apolloClient.query({
      query: GET_ALL_ESSENCE_VIDEOS,
      variables: {
        appID: ESSENCE_APP_ID,
        me: address,
      },
      fetchPolicy: 'network-only',
    })
      .then(({ data }) => {
        const essenceNodes = data.essencesBy?.edges.map((edge: any) => edge.node) || [];
        const parsedVideos = essenceNodes.map((essence: any) => essenceResponseToVideo(essence));
        setRelatedVideos(parsedVideos.filter((v) => v.id !== id))
      })
      .catch((err) => {
        console.log('err', err)
      })
  }

  useEffect(() => {
    fetchVideos()
    fetchRelatedVideos()
  }, [id])
We also defined a fetchRelatedVideos function to fetch related videos for the sidebar, you can see that query definition here.
With the defined a helper function to parse the response into this format (helper function can be found here)
export interface IVideo {
  id: string;
  hash: string;
  title: string;
  description: string;
  location: string;
  category: string;
  thumbnailHash: string;
  isAudio: boolean;
  date: string;
  author: string;
  handle: string;
  isCollectedByMe: boolean;
  collectMw: Record<string, any>;
  contractAddress: Address;

}
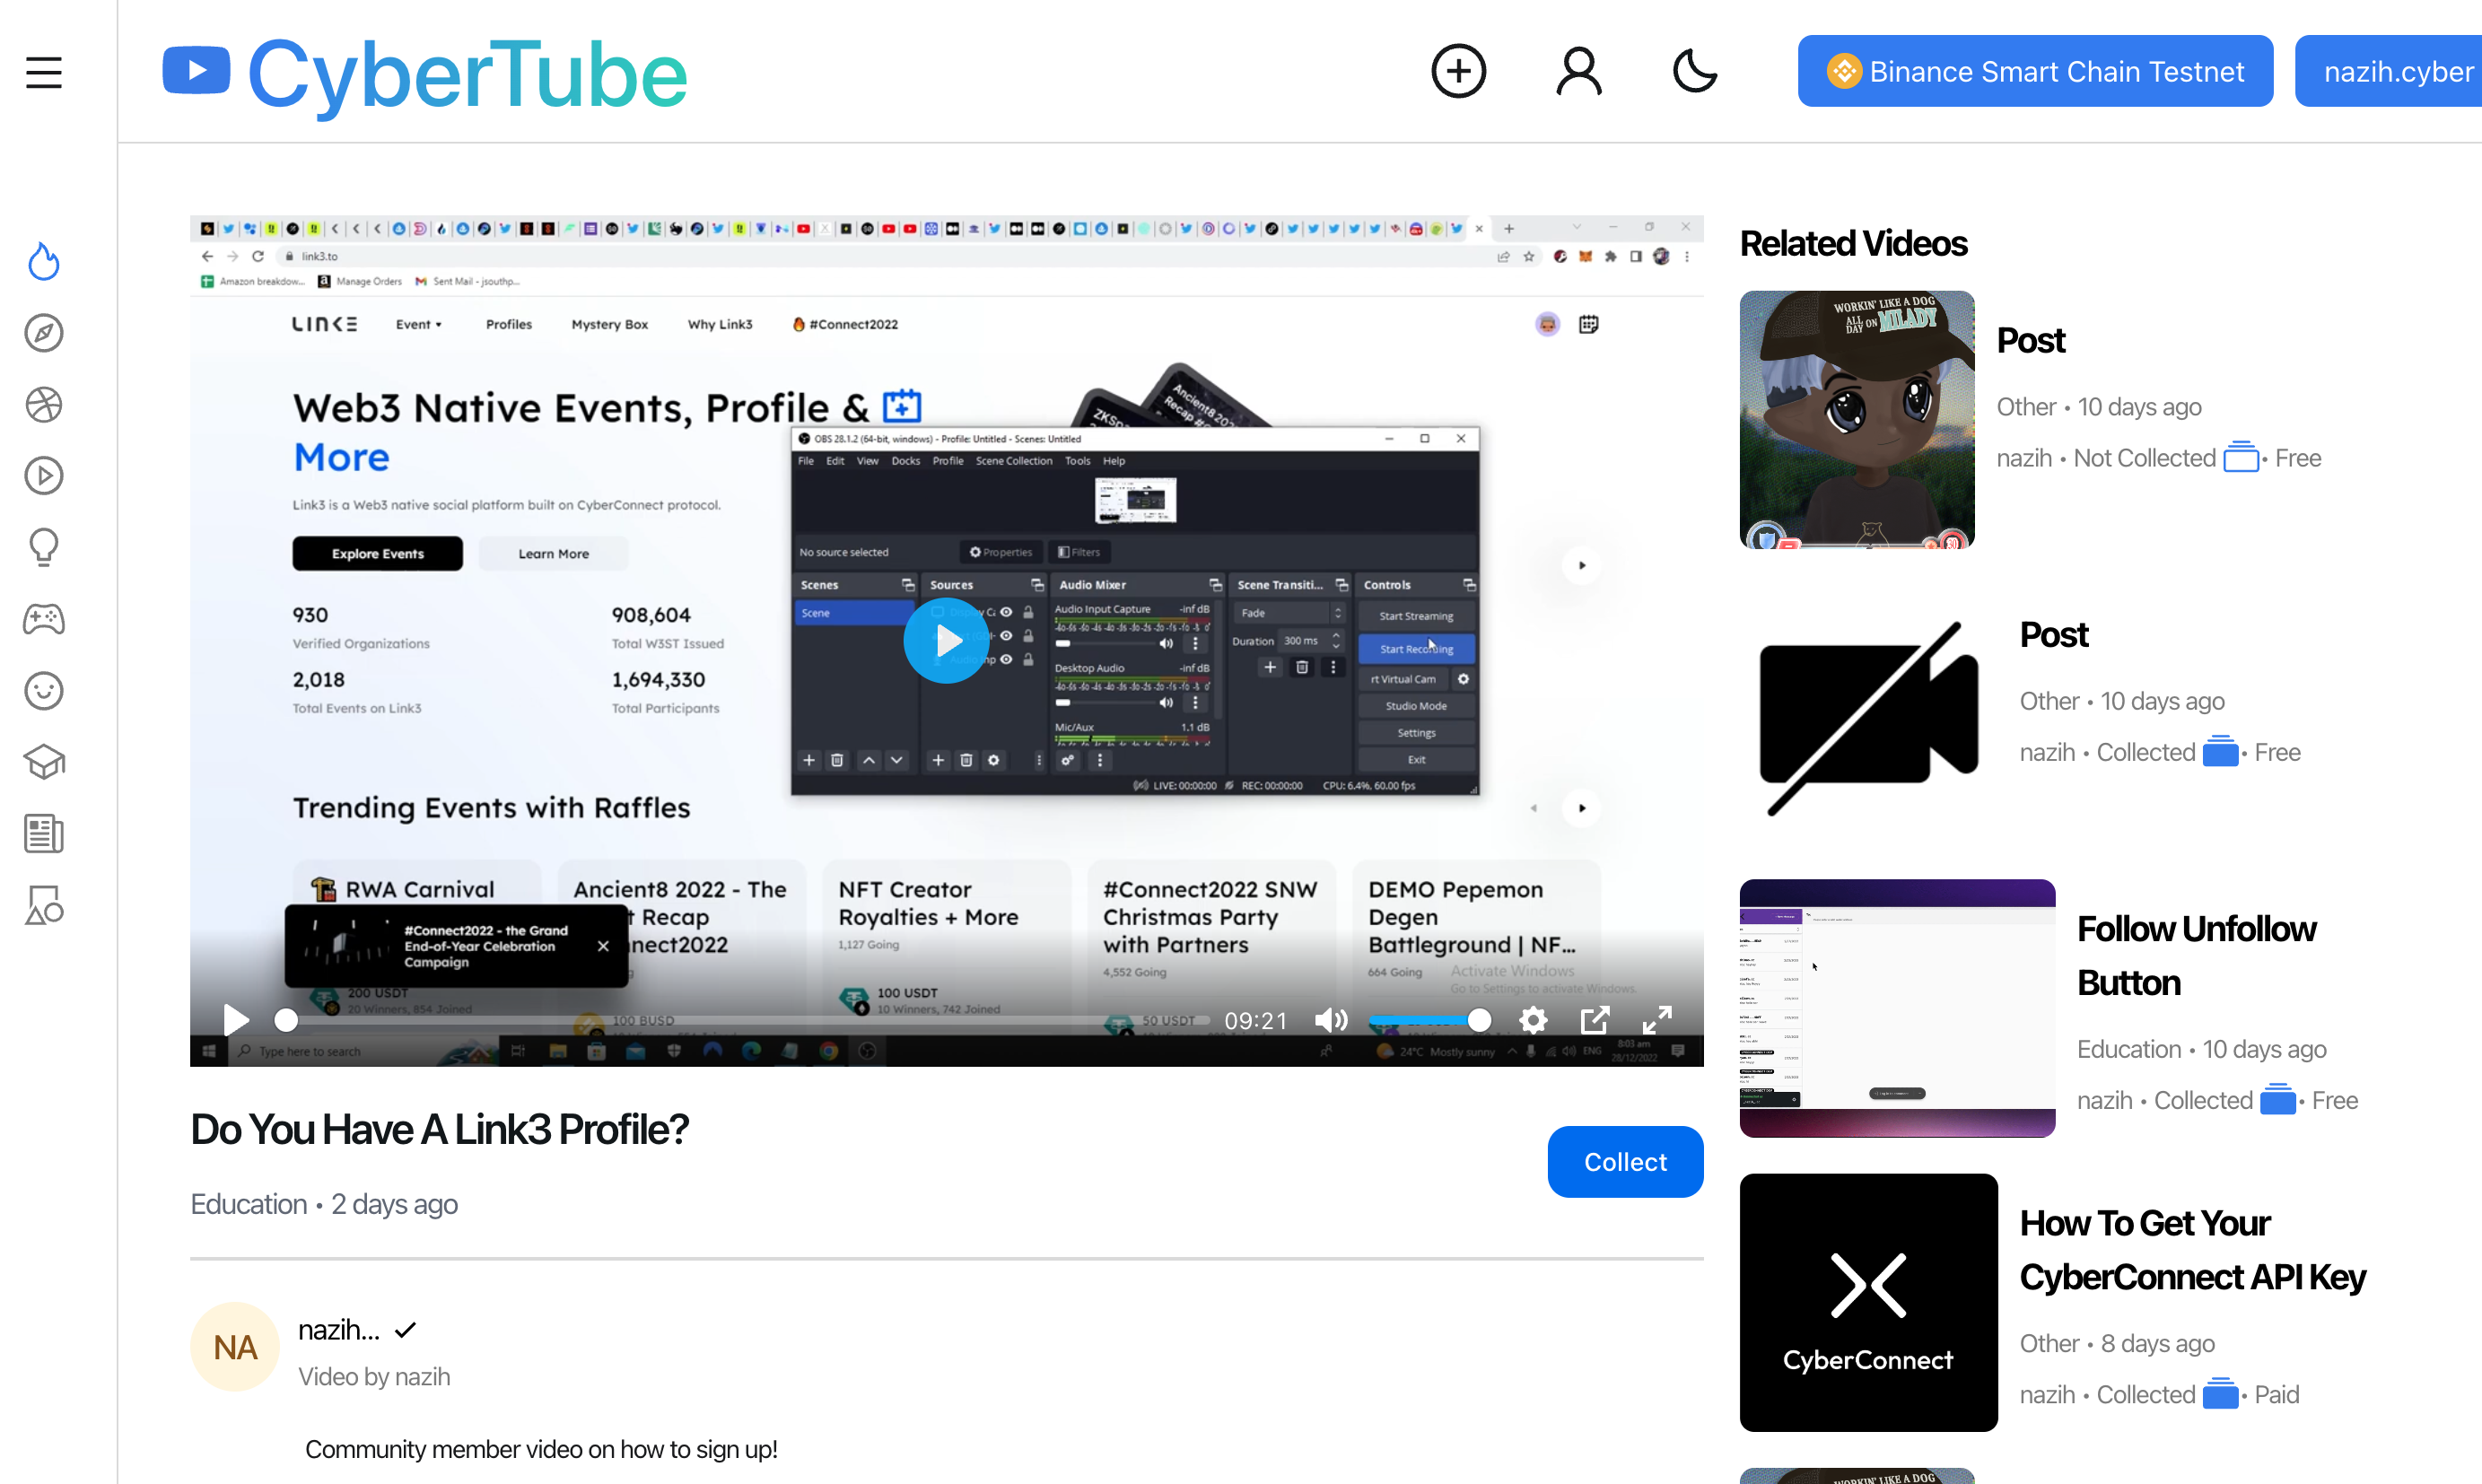
Skipping over the HTML here's the result of displaying the output of those queries:
Collect Button Logic
The final key component of the demo is the collect button. The collect button handler will execute different logic depending on if the post is Free or Paid ((i.e. essence was uploaded as COLLECT_FREE vs. COLLECT_PAID)
Free Collect Button handler
The free collect handling only requires a user signature (we're assuming the application choosing to take the gasless route and paying with its own relayer). The flow is very similar to the video upload we covered earlier:
Create Typed Data (in this case
createCollectEssenceTypedData)Get user signature
Relay the transcation
/* 1. Create typed data in a readable format */
                const typedDataResult = await createCollectEssenceTypedData({
                    variables: {
                        input: {
                            collector: address,
                            profileID: profileID,
                            essenceID: essenceID,
                        },
                    },
                });
                const typedData =
                    typedDataResult.data?.createCollectEssenceTypedData?.typedData;
                const message = typedData.data;
                const typedDataID = typedData.id;

                /* 2. Get the signature for the message signed with the wallet */
                const params = [address, message];
                const method = "eth_signTypedData_v4";
                const signature = await signer.provider.send(method, params);

                /* 3. Call the relay to broadcast the transaction */
                const relayResult = await relay({
                    variables: {
                        input: {
                            typedDataID: typedDataID,
                            signature: signature,
                        },
                    },
                });
                const relayActionId = relayResult.data.relay.relayActionId;
After that we just pass the relayActionId to the polling function within the AuthContext we defined earlier and allow that to take care of poling for the tx and returning the result.
Paid Collect Button handler
The paid collection is slightly more complicated since it requires the user to actually approve that the collectPaidMw contract spends the chosen currency on the behalf of the user to collect the EssenceNFT. So in this case the flow is:
Get the Amount (aka Price) and Currency of the post
Check the balance of the user & request approval for the amount/currency to be spent by the middleware contract
Call the
collectfunction directly from the ProfileNFT contract with the inputcollector (the collecting user)
profileId (profile ID of the profile that posted the video)
essenceId (esence id of the video)
Getting price & currency of the essenceNFT
This information was already returned in the ESSENCE_BY_ID query we defined above. It's stored within collectMw field, so we'll just pass down this information into the CollectBtn.tsx component from the pages/video one.
function CollectBtn({
    profileID,
    essenceID,
    isCollectedByMe,
    collectMw,
    nftAddress
}: {
    profileID: number;
    essenceID: number;
    isCollectedByMe: boolean;
    collectMw: Record<string, any>;
    nftAddress: Address;
})
We can then use the wagmi hook useContractReads to fetch the users' balance of the given currency and check if exceeds the amount/price
if (collectMw?.type !== "COLLECT_FREE") {
        const collectMwData = JSON.parse(collectMw?.data)
        paidCurrency = collectMwData?.Currency
        paidAmount = collectMwData?.Amount
    }
      const erc20UserBalanceContract = {
        address: paidCurrency as Address,
        abi: erc20ABI,
        functionName: 'balanceOf' as const,
        chainId: chain.id,
        args: [loggedInAddress] as [Address],
      };
      const contracts = [erc20UserBalanceContract];
      const { data: readsData, refetch: refetchRead } = useContractReads({
        contracts: contracts,
        onSuccess(data) {
          const _erc20UserBalance = data[0];
          setErc20UserBalance(_erc20UserBalance)
        },
      });
Within the collect button click handler we first check if the user's ERC20 balance exceeds the price, if not we throw an error
if (collectMw?.type == "COLLECT_PAID") {
                await refetchRead();
                if (erc20UserBalance?.lt(BigNumber.from(paidAmount))) {
                    throw Error("You don't have enough balance to collect this essence.");
                }
                writeAllowance?.()
                console.log("calling writeCollect")
                writeCollect?.()
If they do have sufficient balance then we execute the approval & collect contract writes defined below
writeAllowance?.()
writeCollect?.()
We hardcoded some gas limits here because there were some issues estimating gas on the testnet during the demo.
const { config: erc20Config, error } = usePrepareContractWrite({
        address: paidCurrency,
        abi: erc20ABI,
        functionName: 'approve',
        // @ts-ignore: Unreachable code error
        args: [collectMw.contractAddress, BigNumber.from(paidAmount), {
            gasLimit: 1300000,
        }],

      })
    const { write: writeAllowance, data: erc20Data, isLoading: erc20IsLoading, isSuccess: erc20IsSuccess} = useContractWrite(erc20Config)
    const { isLoading, isSuccess } = useWaitForTransaction({
        hash: erc20Data?.hash,
      })
    const { config: collectConfig } = usePrepareContractWrite({
        address: CC_PROFILE_CONTRACT_ADDRESS[chain.id] as Address,
        abi: ABI,
        functionName: 'collect',
        // chainId: chain.id,
        args: [{ collector: loggedInAddress, profileId: profileID, essenceId: essenceID}, '0x', '0x',{
            gasLimit: 1300000,
        },],
        onError: async function (error) {
          const message = handleCollectEntryError(error);
          toast.error(message);
          setLoading(false);
          return;
        },
      });
      const {
        data: collectData,
        write: writeCollect,
        writeAsync: writeCollectAsync,
        isSuccess: collectIsSuccess,
        isLoading: contractWriteLoading,
      } = useContractWrite({
        ...collectConfig,
        async onMutate(data) {
            console.log('Mutate data ', data)
          },
        async onSettled(data, error) {
          console.log('Settled', { data, error })
          setLoading(false);
        },
        async onSuccess(data) {
          console.log('Success', data);
          setLoading(true);
          await data.wait();
          await refetchRead();
          setLoading(false);
          },
          async onError(error) {
            console.log('CollectWrite Error', error);
        }});
Now all that's left is to define our button return statement
return (
        <Button
            onClick={handleOnClick}
            disabled={stateCollect}
            auto
        >
            {loading ? <Loading color="currentColor" size="sm" /> : stateCollect ? "Collected" : "Collect"}
        </Button>
    );
}
and you can see the result of all this work in the video below
Additional Nice-to-have features that were added but not explained here
Profile page
Mint button if profile redirect button if the user doesnt have a ccProfile
Conclusion
Livepeer's infrastructure brings improved reliability and cost-effectiveness to video streaming. CyberConnect's tools enable developers to easily build composable applications utilizing user-generated content and social connections on the CyberConnect protocol while maintaining user sovereignty over and interoperability of data. The integration of Livepeer with CyberConnect's decentralized social graph makes it possible for developers to build robust Web3 social dApps that incorporate video content and this is a significant step in bringing Web3 social experiences to mass adoption.


